GFX Advanced HUD
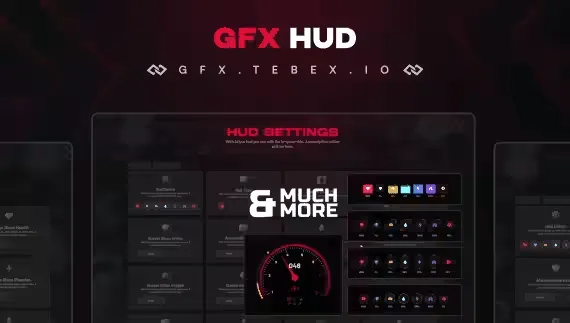
A free HUD script that covers character status, map info and vehicle readouts in one resource. It runs on ESX, QBCore and Qbox, and every part of it can be adjusted from the config file to fit your server. Players get their own settings menu on top of that, so nobody is stuck with your defaults.
What It Shows On Screen
- Character stats: Health, Armor, Hunger, Thirst, Energy, Stamina and Mental Health, with 4 status box designs to choose from
- Map display: shows the player's location and the current time
- Key binds: essential key bindings displayed directly on screen
- Vehicle HUD: detailed vehicle information, including a responsive nitro gauge
In-Game Customization Menu
- Colors: recolor the status indicators to match a personal preference or your server theme
- Layout: rearrange HUD elements so each player can place them where they want
- Visibility: show or hide individual HUD components
- Styles: swap between the 4 character status box designs from the settings menu
It costs nothing and is available on the GFX Store. If your server is still on a default or dated HUD, this is an easy swap that gives players real control over what they see.
Product information
Compatibility, delivery and setup
Check these listing details against your server before checkout. The documentation supplied with the download is the source of truth for exact dependencies, file names and configuration.
Compatibility
- Resource type
- FiveM script
- Category
- ESX Scripts
- Creator
- Not listed
Order details
- Price
- FREE
- Delivery
- Unique download link sent by email after checkout
- Sold by
- CFX Tebex Store Official
- Updates
- Lifetime updates included
Installation checklist
Start with the files and readme included with this product.
-
Match the requirements
This listing names esx, qbcore, qbox support. Check the description and readme for required inventory, target, library, database or map resources.
-
Keep the supplied names and order
Do not guess or rename the resource folder. Use the dependency order, config values, SQL and item definitions supplied in the download when they are present.
-
Start it after its dependencies
Upload the folder to
resources/, then addensure <download-folder>toserver.cfgusing the exact downloaded folder name. -
Test before going live
Start it on a development server, check the console for missing dependencies, then test every action described on this page with the integrations used by your live server.
Write a review
Reviews are moderated before appearing. Purchased the product? Your review gets a VERIFIED badge automatically.